Greetings! It’s been a while since I’ve done a post or a project for that matter, so my creativity has been itching for an outlet after the proverbial holiday hangover finally wore off.
Charlotte is getting to the age where she’s running around and into everything. Ryan and I can hardly cook dinner at night without her being at our feet begging for attention, so I decided it was high time she had her own play kitchen with which to busy herself. I’ve been working on putting together a playroom for her, and I wanted the right play kitchen to be the “Piece de resistance.”
These days they have so many amazing retro looking kitchens out there by Kidkraft and Pottery Barn, you can really spend as much as you want on one of these.
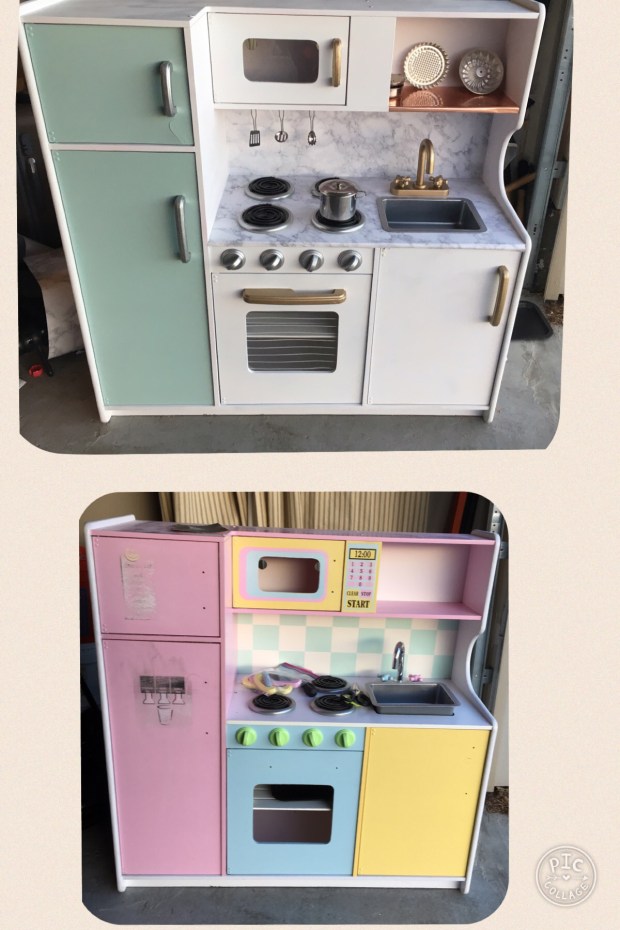
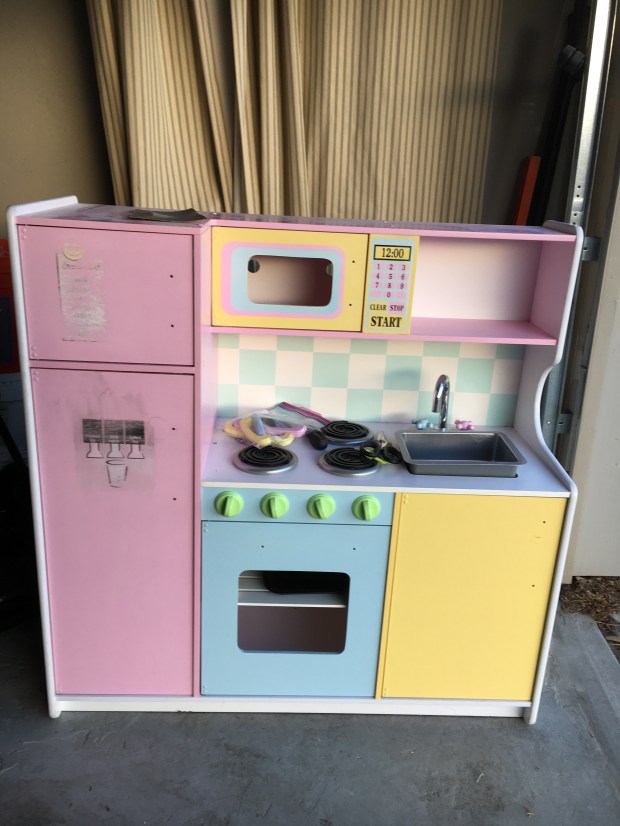
I, however, could not be content to purchase one of these for a $100+, so i started looking on Craigslist, LetGo, and Facebook Marketplace and came across an old kidkraft pink and blue kitchen that came with an adorable little play room table for $40. It was in great shape, so we went to pick it up and I got to work.
The hardest part about this project is disassembling the kitchen. It came apart and went back together pretty easily (much to my surprise and relief)!
You’ll want to sand it lightly, especially if you plan to paint it, especially in the areas where they have screen printed these little stickers as part of the appliance gadgets. Have a variety of allen wrenches and small screwdrivers on hand to take it apart, and make sure you place the parts all together in labeled ziplock bags.
This will save you a headache later.
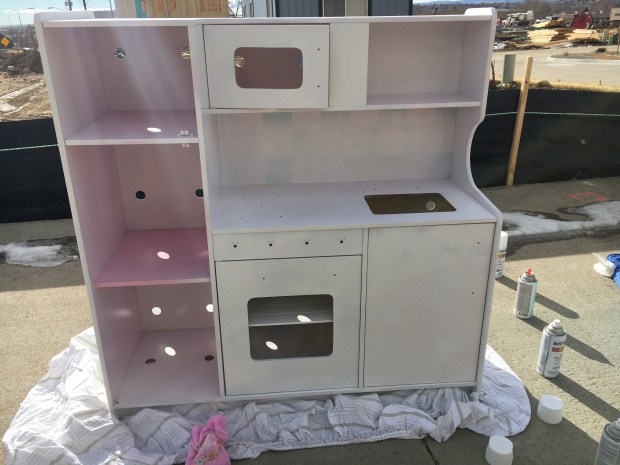
Sanded Kitchen and beginning of disassembly:
These screws can be TINY! Put them all together in labeled bags: 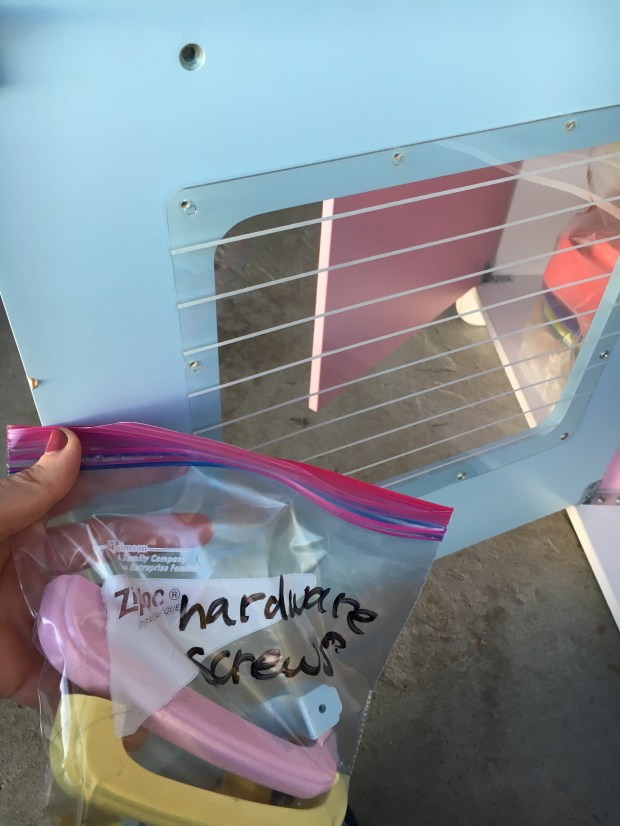
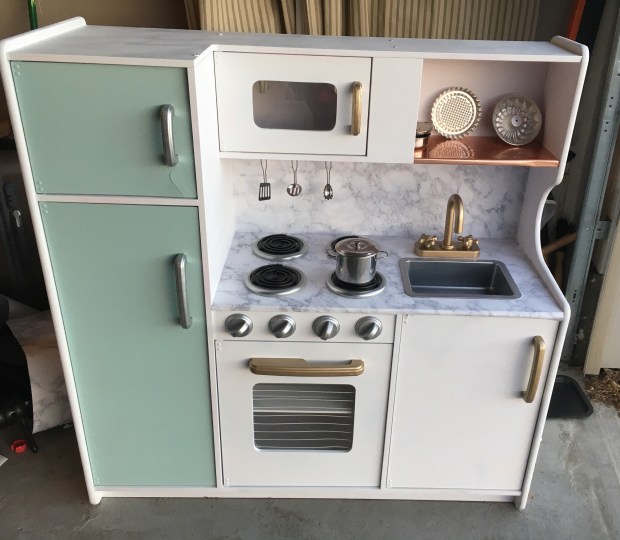
Once everything is disassembled, it’s the fun part. I used a semigloss regular white spray paint and went to town on the body of the kitchen.
I wanted a pop of color, so I painted the doors to the fridge a robin’s egg blue to give it that retro look. This also matches her nursery.

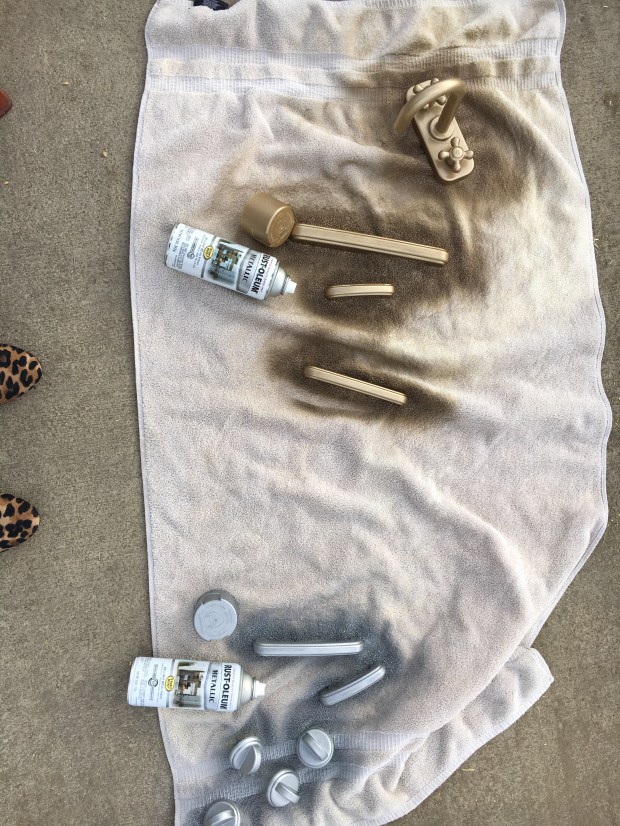
Next was painting the hardware. I wanted that mixed metal look I’m seeing in all these new gorgeous kitchens, so I decided it’d be silver for the fridge hardware and oven knobs, and gold for the sink hardware and handles. And yes, I spray paint in leopard flats, because I’m fabulous, that’s why.
You’ll want to do a couple of coats on all of the above. And play the waiting game. For me, that’s the second hardest part. I could see the end in sight, and I was so ready to get it put back together (before I forgot how I took it apart!)
Once the paint dries on the body of the kitchen, you can add the fun details. I opted for contact paper to give it that posh marble counter look, and the detail of a copper shelf (mmmm mixed metallics).
I got mine at Lowe’s, after striking out at Wal-Mart & Home Depot.

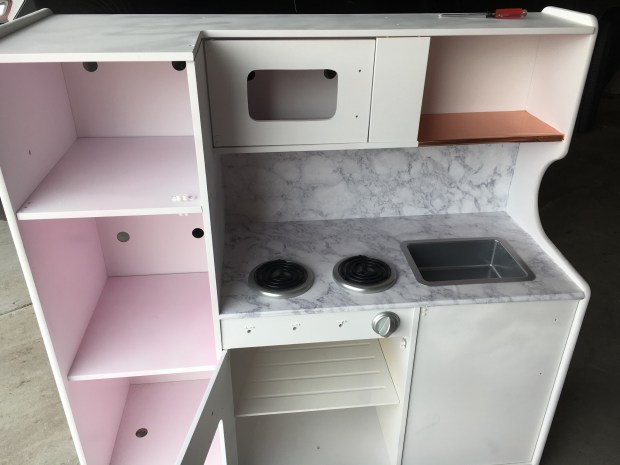
The contact paper requires some precision with measuring/cutting and then putting into place without getting bubbles in it. It’s also very thin, so you must be careful not to tear it, but all in all, it’s still a simple job and really gives it a wow factor.
Subway tile backsplash would have been preferable, but alas- I couldn’t find any contact paper with subway tile pattern on it, and at 15 months old, she can wait just a little longer for her dream kitchen. 🙂
Once the pieces are dry, you’ll want to spray paint a clear gloss protective coat over the hardware that she’ll be touching a lot, like the handles and knobs.
Once that’s dry, it’s assembly time! and I must say, for someone who typically shies away from involved projects like this, it was really very simple.
I put the doors on, the hardware, and added some command hooks for her utensils (these all came with the play kitchen too, so I just gave them a run through the dishwasher).
And Voila! Glam play kitchen fit for any little prince or princess.
Let me know what you think or if you have any questions, and if you decide to take on a project like this for your little, send the pics my way! I love seeing them.